Calcibond Series
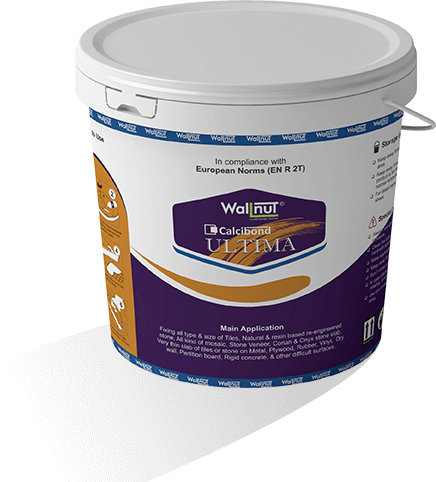
Calcibond Ultima
Certificates:EN certifiedIS certifiedEN 12004IS 15477+2 more
Mumbai City, MH
Storefront →Brand Wallnut
Price on request
MOQ 1 0 daysCurrency INR
Estimated delivery by 7 Jul 2026
Customization for this product
null
BharatSeal order protection
Secure payments
Every payment is processed via Razorpay with PCI-DSS data protection and SSL encryption. We never see your card details.
PayUPIVisaMCAmexRuPayNet BankingWalletsPay Later+ more
Money-back protection
Claim a refund if your order doesn't ship, arrives damaged, or doesn't match the agreed spec. Disputes resolved within 7 working days.
Trade Assurance — not yet enrolled by this seller
This seller has not yet activated Trade Assurance. Pay outside BharatSeal at your own risk — we recommend chatting first to verify.
Only orders placed and paid through BharatSeal can enjoy free protection by 🛡 BharatSeal Trade Assurance.
Service
0-day production
Standard lead time once order is confirmed.
Highlights at a glance
- ✓Brand: Wallnut
- ✓Category: Calcibond Series
- ✓Made in Mumbai City, MH, India
- ✓Minimum order: 1 units
- ✓Certified: EN certified, IS certified, EN 12004
About this item
- Supreme Bond on Plywood
- S2 High Flexibility
- Freeze-Thaw Resistance
- Ultra-Thin Application
- Long-Life Performance
- Waterproofing + Adhesive
- Large Format & Slim Slabs
- Extreme White Colour
Description
The ultimate polyurethane adhesive — for large format tiles, stone slabs, facades, metal, wood & drywall. India's highest-performance tile fixing solution.
Hi-Tech Features
Calcibond Ultima is a unique eco-friendly, very high flexible two-part POLYURETHANE ADHESIVE — with elongation of 30mm for the most demanding installations.
Best Suitable Areas
- High-Rise Facades
- Residential & Commercial
- Industrial Buildings
- Public Infrastructure
- Pools, Jacuzzi & Saunas
- Dado, Lifts & Heavy Movement
Application Guide
01
Suitable Surfaces
+
- Stable structure of metal, marine-grade plywood, Vinyl PVC & rubber surfaces
- Existing surfaces of Epoxies & PU coating
- All kinds of drywall boards — cement-based, wood particle, gypsum, calcium silicate
- Fully dry and sound new or old traditional plaster
- Existing tiles or stone surfaces
- New or old absorbent IPS or PCC floors that are sound and stable
- Screed made with Wallnut Zeorich Base, Zeorich Base Rapid, or similar
- Fully cured stable concrete including precast concrete
- Surfaces made with AAC (Autoclaved Aerated Concrete) panel
02
Suitable Covering Materials
+
- All kinds of ceramic & vitrified tiles of all sizes including metal and wood tiles
- Natural stones sensitive to moisture, stone veneer, slate stone, laminated stone, Corian
- Onyx stone & agglomerated re-engineered resin-based quartz stone
- Large-size slabs of tiles & stone bonded with fibreglass mesh on the back
- All types and sizes of ceramic & glass mosaic
- Slim Tiles slab in 3mm thickness or cut stone with minimal thickness
03
Surface Preparation
+
- Ensure surface is sound, clean and free from oil, grease and dust
- If surface is uneven by more than 15mm, first level using correct material
- Do not pre-wet the surface with water
- For larger areas, provide movement joints every 3 metres or per local standard
- On external facades: avoid direct sun exposure — let surface cool before application
- Follow concrete expansion joints and connection joints per standard
04
Mixing Instructions
+
- Open mono pack and mix full quantity of Part A hardener into Part B thick paste
- Use a slow-speed electric stirrer until homogeneous — manual mixing may compromise performance
- For part quantities: strictly maintain Part A:Part B ratio of 1:10
- Use a measurement jar to ensure correct ratio — incorrect ratio compromises performance
- Use mixed material within the pot life period
05
Application
+
- Spread adhesive to desired thickness using Wallnut notch trowel
- Fix tiles or stone onto adhesive before skin formation — press firmly
- For large format tiles or stone: also apply adhesive layer on the back (back-buttering)
- For spot bonding: ensure minimum 25% tile surface coverage with adhesive
- Leave space between tiles for proper grouting and surface movement accommodation
- Leave 24 hours to bond — then grout with Wallnut Connect & Lock Epoxy Grout
Application Tips
🌡️
Temperature
Ideal working temperature: 10°C to 35°C. Avoid applying in direct sunlight or on very hot surfaces on external facades.
⏱️
Open Time
Work within the specified pot life after mixing. Extended open time (EN T class) gives you more working time vs standard adhesives.
📐
Notch Trowel Size
Use the correct notch trowel for your tile size. For large format tiles (>600mm), use a 10mm or 12mm square notch trowel.
💦
Cure Time
Full cure at 28 days at 23°C / 50% humidity. Light foot traffic after 24 hours. Do not grout before full initial cure.
⚠️
Always mix Part A and Part B at the correct 1:10 ratio using a measurement jar. Incorrect mixing ratio will compromise adhesive performance and bond strength.
Technical Specifications
European Norms — EN 12004EN R2T · S2
Classification
EN R 2T · S2 (Reactive Adhesive)
Standard
EN 12004 / ISO 13007
Initial Shear Adhesion
> 4.5 N/mm² (EN 12003)
Shear after Water Immersion
> 4.0 N/mm² (EN 12003)
Tensile Adhesion (7 days)
≥ 3 N/mm² (EN 1346)
Tensile after Freeze/Thaw
≥ 2.75 N/mm² (EN 1346)
Elongation (full strength)
> 30%
Vertical Slip
< 0.5 mm (EN 1308)
Transverse Deformation
S2 ≥ 10 mm
Test Conditions
28 days · 23°C · 50% humidity
Indian Standard — IS 15477Type 5
Classification
IS 15477 Type 5 Adhesive
Shear Adhesion (Dry)
≥ 6.2 N/mm²
Shear Adhesion (Heat Aged)
≥ 4.2 N/mm²
Tensile Adhesion (Dry)
≥ 3.15 N/mm²
Test Conditions
28 days · 27°C · 65% humidity
Key attributes
Packaging & delivery
Certificates
EN certified
IS certified
EN 12004
IS 15477
ISO 13007
IS 15477 Type 5
EN R2T
S2 Class
ISO 13007
IS 15477 Type 5
EN C1 TE
ISO 12004
IS 15477 Type 1
Reviews
Questions & answers
Ask the supplier — answers are visible to all buyers
No questions yet. Be the first to ask!
Know your supplier
WALLNUT BUILDING SOLUTIONS INDIA PRIVATE LIMITED
Unverified<1 yr on BharatSealMumbai City, Maharashtra
Orders completed
—
On-time delivery
—
Reorder rate
—
Year founded
2017
Staff size
—
Certifications
13